Resources/Digital Workflow
Technical Guide

Scans We
Can Design
From

A digital case is only as good as the margin. This is what we need to see in a scan, in what order to capture it, and how to get the file to us without losing data along the way.

Capture Sequence

Getting The Margin

Margin visibility is the single most common reason we come back to a practice on a digital case. The scanner records what it can see — if the margin is under blood, saliva or unretracted tissue, it is not in the file, and the design is a guess.

01

Manage the tissue first

Retraction cord, a diode laser or an astringent paste — whichever you prefer, but do it before the first scan pass rather than after discovering the margin is obscured. A dry, retracted field for the thirty seconds it takes to capture the preparation quadrant is worth more than any post-processing.
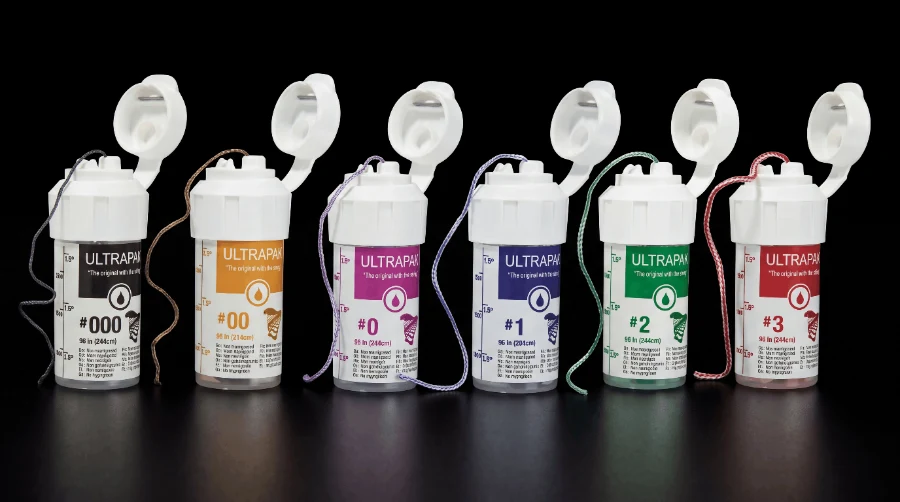
Retraction cord dispensers in graded sizes
02

Scan the preparation quadrant while it is dry

Capture the prepared tooth and one tooth either side first, before moving to the full arch. If the field starts to fill, you have already secured the part of the scan that matters. Come back and re-scan just the preparation if needed rather than restarting the arch.

03

Complete the arch, then the opposing

Full arch on both sides. Partial-arch scans give us no way to verify the occlusal plane or check the design against the rest of the dentition, and they make anterior aesthetics substantially harder to judge.

04

Record the bite in maximum intercuspation

Buccal bite scans on both left and right, with the patient closed and verified. One-sided bite records introduce a rotation we cannot detect until the restoration is tried in. If the case is being opened or the bite is being changed, tell us — do not leave us to infer it from the scan.

05

Review before you send

Rotate the preparation on screen and look at the margin circumferentially. Holes, stitching artefacts and blurred margin lines are all easier to fix while the patient is still in the chair than after the case has been designed.

Implant Cases

Scan Body Protocol

Required

Tell Us The System

Implant brand, platform diameter and scan body type, stated on the prescription. Scan bodies from different manufacturers are not interchangeable and the library we design in has to match the component in the mouth.

Required

Seat It Fully

Confirm the scan body is fully seated and hand-tight before scanning. A partially seated body produces a design that will not seat, and the error is invisible in the file. Send a periapical radiograph with it — it lets you confirm seating and lets us see the bone profile, so we can design the abutment emergence to suit.

Required

Capture The Tissue

Scan the soft tissue emergence with the healing abutment removed, then place the scan body and scan again. Without the tissue profile we cannot design an emergence that supports the gingiva.

File Handling

What We Accept

We work with open files and connect to the main manufacturer portals. If your export route is not listed, send one case through and we will confirm it before you rely on it.

FormatUseNotes
Portal transferDirect case sendPreferred — fastest route, no file handling required
STLPreparation and arch scansUniversal; send unmeshed where possible
PLYScans with colour dataPreferred for anterior aesthetic cases
OBJTextured scansAccepted; include the texture file
Troubleshooting

Common Faults

The margin looks fine in the surgery but the lab queries it

On screen at chairside magnification a margin can read as clean while the underlying mesh is incomplete. We are looking at the same data with the design software's margin detection running over it, which is less forgiving. If we query a margin, it is because the software cannot resolve a continuous line.

The restoration is high on delivery

Usually a bite record problem rather than a design one — most often a single-sided buccal bite, or a bite scanned before the patient had fully closed. Two verified buccal scans in maximum intercuspation eliminates most of these.

Contacts are too tight or too open

Adjacent teeth scanned with a matrix band or wedge still in place will not reflect the real contact position. Remove anything separating the teeth before the arch scan. On implant cases, consider taking an additional scan body scan as well — merging the two lets us confirm the scan is accurate before we design the contacts.

Anterior shade does not match despite a good scan

Geometry and shade are separate problems. A perfect scan carries no shade information unless it is a colour-capable file, and even then we would rather work from photographs. See the case submission guide for the photography protocol.

Setting Up A Scanner?

We will run a test case through with you and confirm the transfer route before it matters on a real patient.